Testing your Controls
QuartzIQ allows you to easily test your Controls' design effectiveness, implementation and operational effectiveness, and give you an overall score. This allows you to easily identify which Controls are not sufficient for your Risk mitigation strategy.
This feature allows you to create Control Testing Projects where you can add the Controls you want to test, and then rate them individually. Each Project is also set in a specific timeframe so you can perform your annual, bi-annual or quarterly Controls Testing.
This feature is only available to users with the iq-controlstesting role.
Creating Controls Testing Projects
As stated above, your Controls Testing in QuartzIQ is done through Controls Testing Projects where you can add your Controls.
Please note that you can only add the same Control to one Controls Testing Project, that is not closed, at a time.
To create your Controls Testing Project, navigate to the Controls Management > Controls Testing section in the side menu.
You can then use the Create Control Testing Project button, and you will be prompted with the following information:
- Name: the name of your project.
- Start Date: this is only informational. This represents the date at which you want to start your project.
- End Date: this is also informational. This represents the date at which you want to end your project.
- Deadline: this is aslo informational. This represents the date at which you want to have all your Controls rating. This is usually the same date as the end date, or a bit before.
Once your Controls Testing Project is created, it will automatically be set in the In Progress status. You can easily change its status using the blue In Progress button at the top right.
From this page, you can now add the Controls you want to test using the Add Controls button.
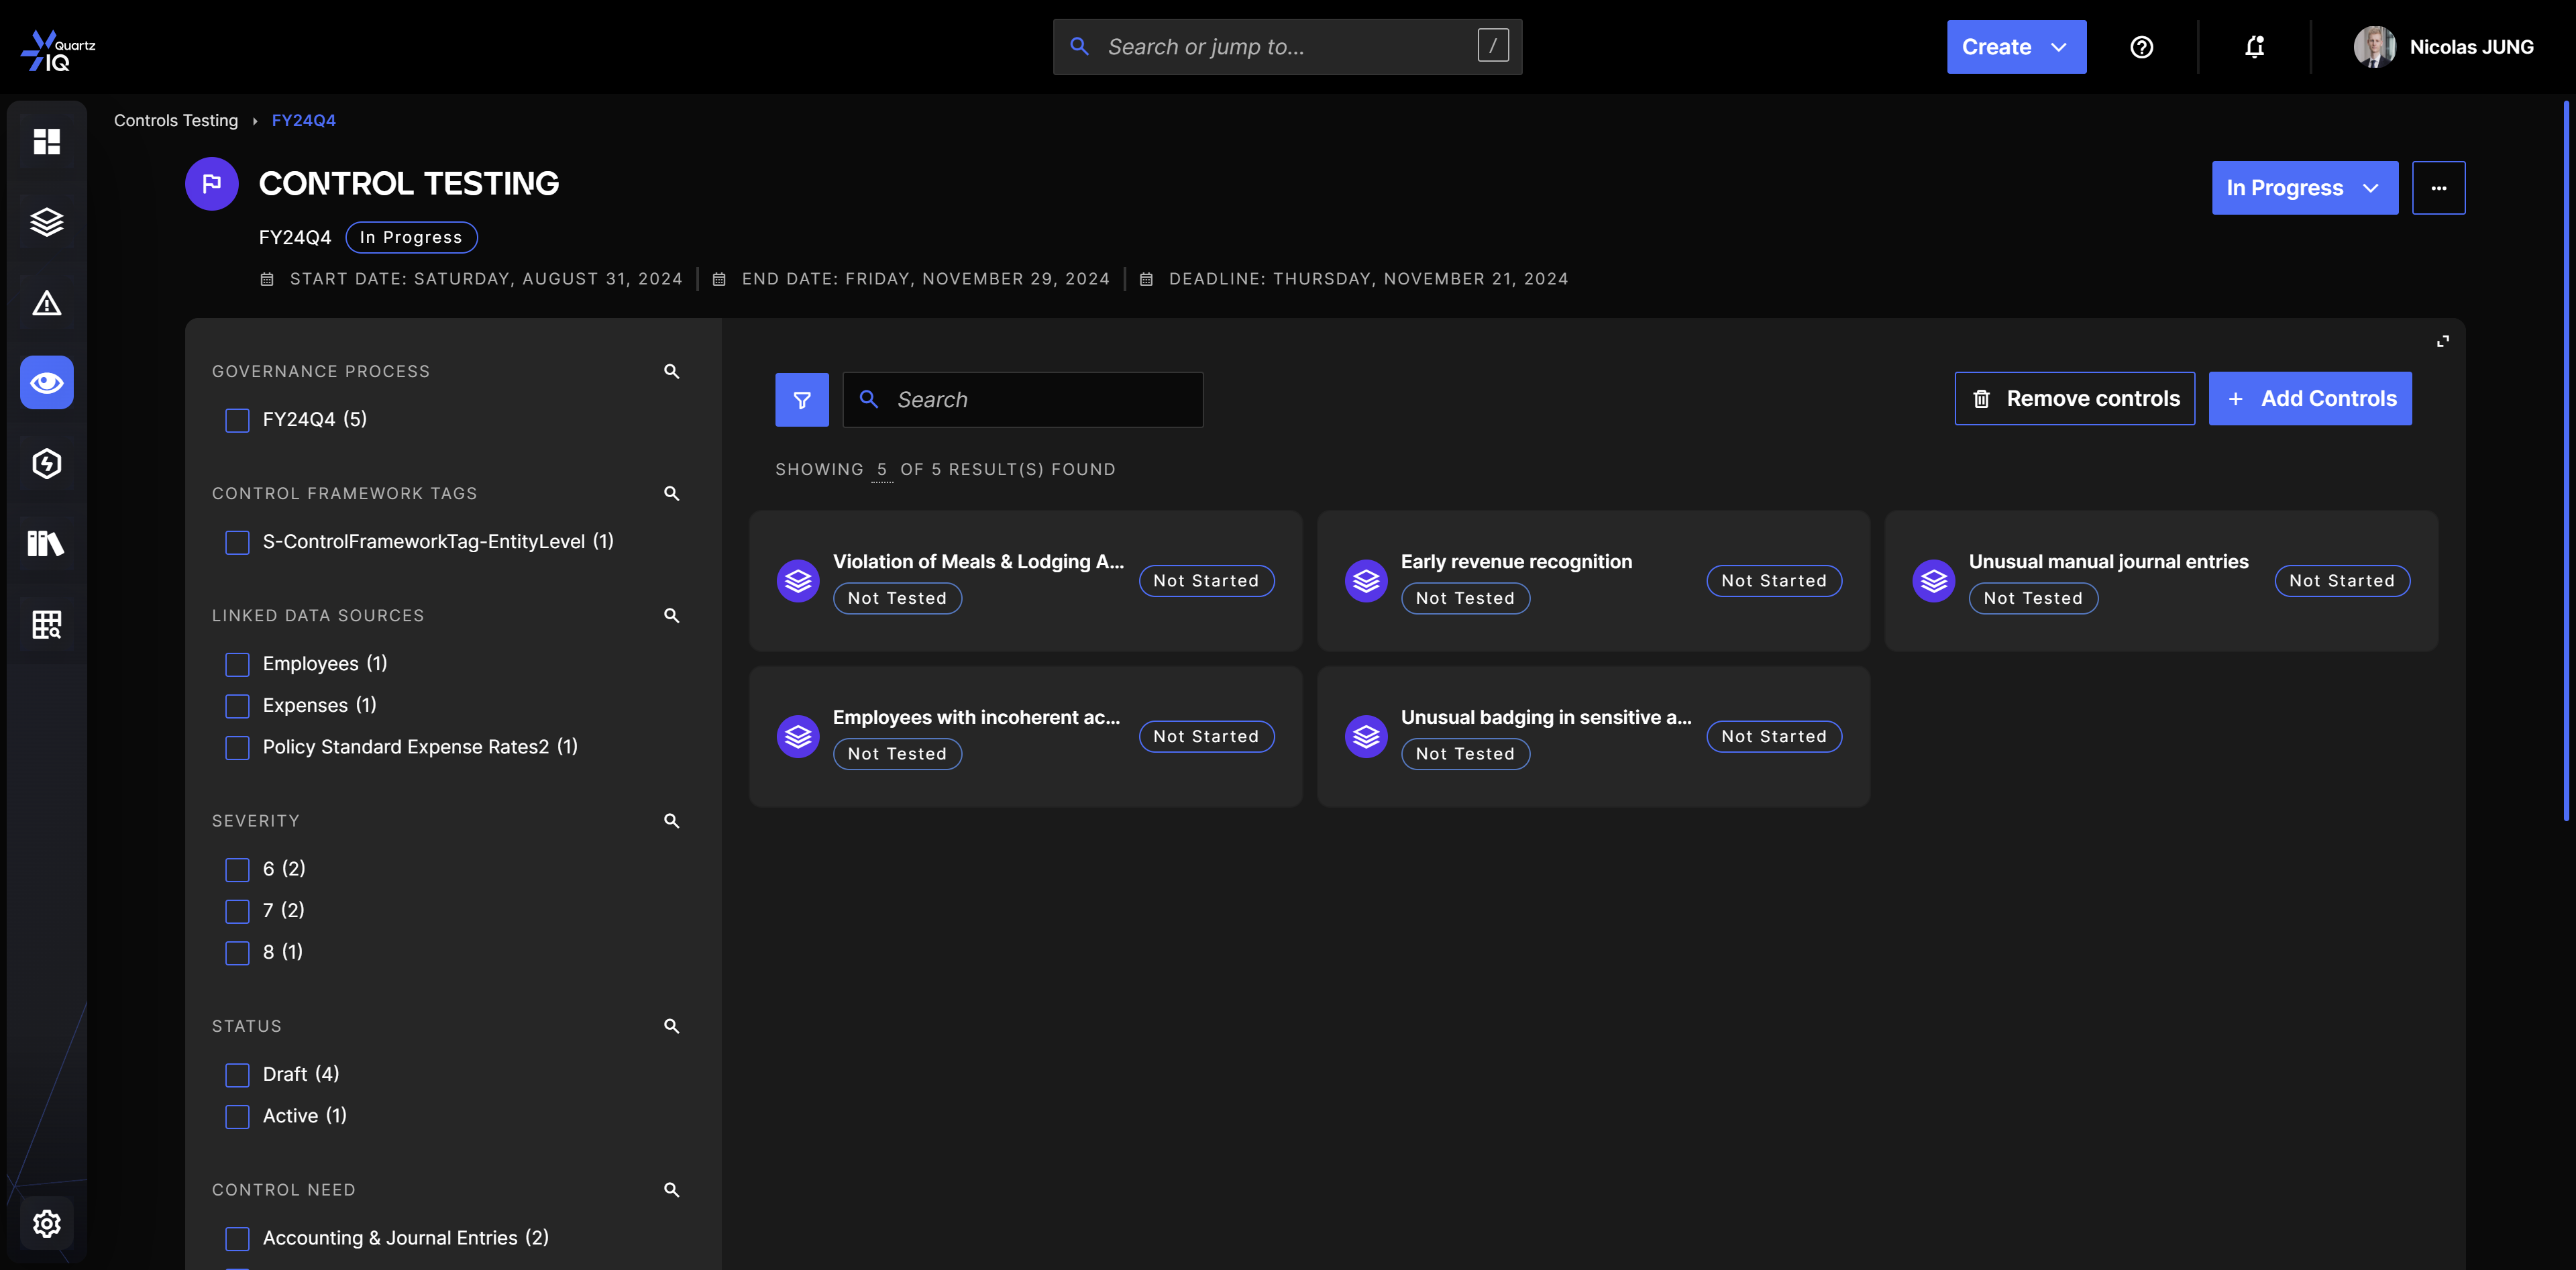
After adding all your Controls, you can easily see their Control Testing status on the right of each card. This status allows you to know if you have already started or finished the testing of the Control, using these statuses:
- Not Started
- In Progress
- Pending Review
- Reviewed
Each rating is also showed on the bottom of the card. By default, since it has not been rated yet, you will see the Not Tested result.
Testing your Controls
Once you have created your Controls Testing Project and added your Controls, you can now begin your testing.
In you Controls Testing Project, you can click on any Control that you want to test. This will bring you to the Control's page where you will see all its information, execution details, Alerts or Tasks, etc.
At the bottom of the page, you will have access to a tab that you can expand. This is the tab where you will perform your Controls Testing.
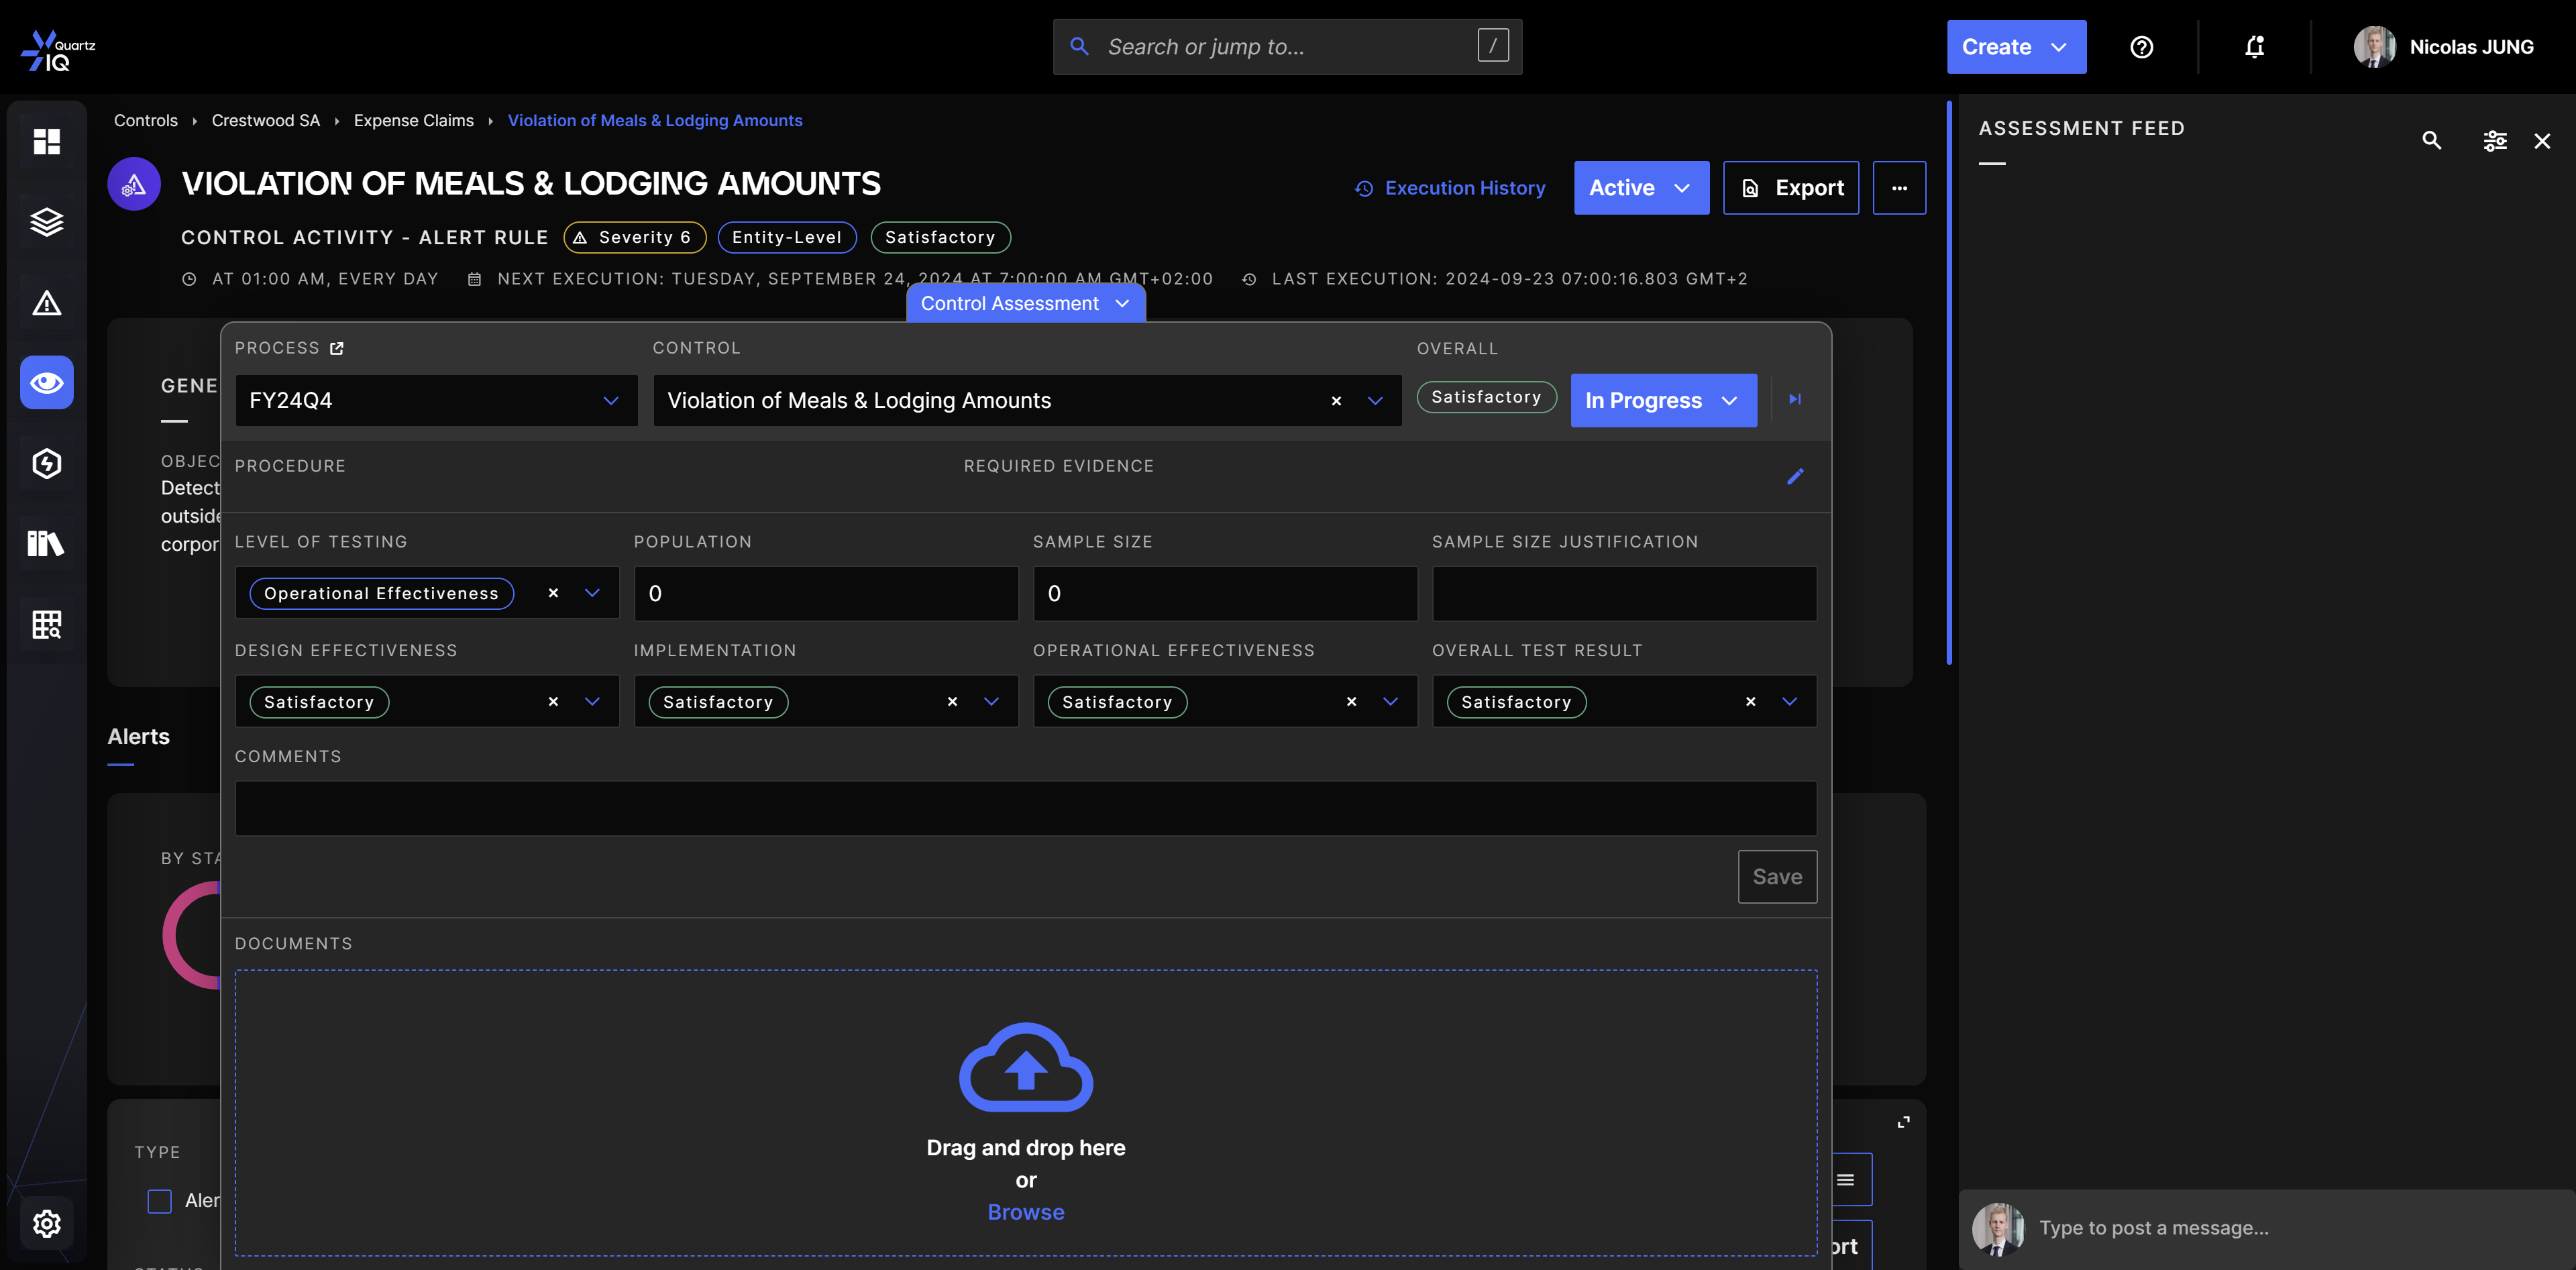
You also have a feed where you can comment and add information at the right of the screen. This is only visible for the Controls Testing team (users with iq-controlstesting).
In the Control Assessment overlay, you can see:
- Process: this is the Controls Testing Project in which you want to rate your Control. You can change it to view previous Projects' ratings for this Control.
- Control: this is the Control you are testing. You can switch to other Controls you added to the Controls Testing Project.
- Overall: this is the overall test result that you can modify below.
- Status: this is the blue button in the overlay which allows you to change the status of the Controls Testing assessment.
- Procedure & Required Evidence: these are fields to help you during your Controls Testing assessment. This should contain the procedure used to test the Control, and the evidence that is expected for the assessment to be valid. You can modify these fields using the pencil button, and these will be reused if you add this Control to another Project in the future.
- Level of Testing: this allows you to specify the extent and depth of control testing.
- Population: the population refers to the total number of Alerts/Tasks that are subject to the control within a the period on which you are assessing your Control.
- Sample Size: the sample size refers to the number of items from the population selected for testing.
- Sample Size justification: the sample size justification explains why a certain sample size was chosen. This could be based on statistical methods, professional judgment, or audit standards.
- Design effectiveness: the design effectiveness rating assesses whether the control is appropriately designed to mitigate or prevent risks.
- Implementation: the implementation rating evaluates whether the control has been correctly implemented as designed.
- Operational effectiveness: the operational effectiveness rating measures how well the control performs.
- Overall test result: the overall test result indicated the overall rating based on the design effectiveness, implementation and operational effectiveness ratings.
- Comments: this allows you to add any comments to your assessment.
- Documents: you can also attach any documents using this section.
- Findings: within this section, you can add existing findings from the Findings & Action Plans section in the side menu. This is only available if you have the module enabled or the Premium or Enterprise plan.
To begin your assessment, you must use the blue button to transition the status to In Progress. You can then modify the fields below. Don't forget to use the Save button to save your work.
You can also use the blue arrows at the top of the overlay to go to the next Control you need to assess in this Controls Testing Project.
Once you have done all your ratings, you should then transition each assessment to Pending Review, where a review step is usually done by another member of your team.
The review step is done the same way as the assessment using the overlay.
Once all your Controls have been rated, you can close the Controls Testing Project using the status button in the Controls Testing Project page.
The last Controls Testing rating (overall) will be shown on the Controls pages, and you can also filter on these values in the Controls search.